Windows 11 is one of the most advanced and user-friendly operating systems available today. If you want to change the name of your computer, the process can be extremely simple and beneficial. This step is especially useful when you are managing multiple devices on your network. Below we are describing 5 simple and effective ways to rename PC in Windows 11.
1. Rename via Settings App
The Settings app of Windows 11 provides convenient and simple methods for the user. Follow the following steps:
1. Open Settings:
Click the Start menu and go to “Settings“.
You can also use the `Windows + I` shortcut.
2. Go to the System section:
Click on the System tab in the left sidebar.
Then select the “About” option.
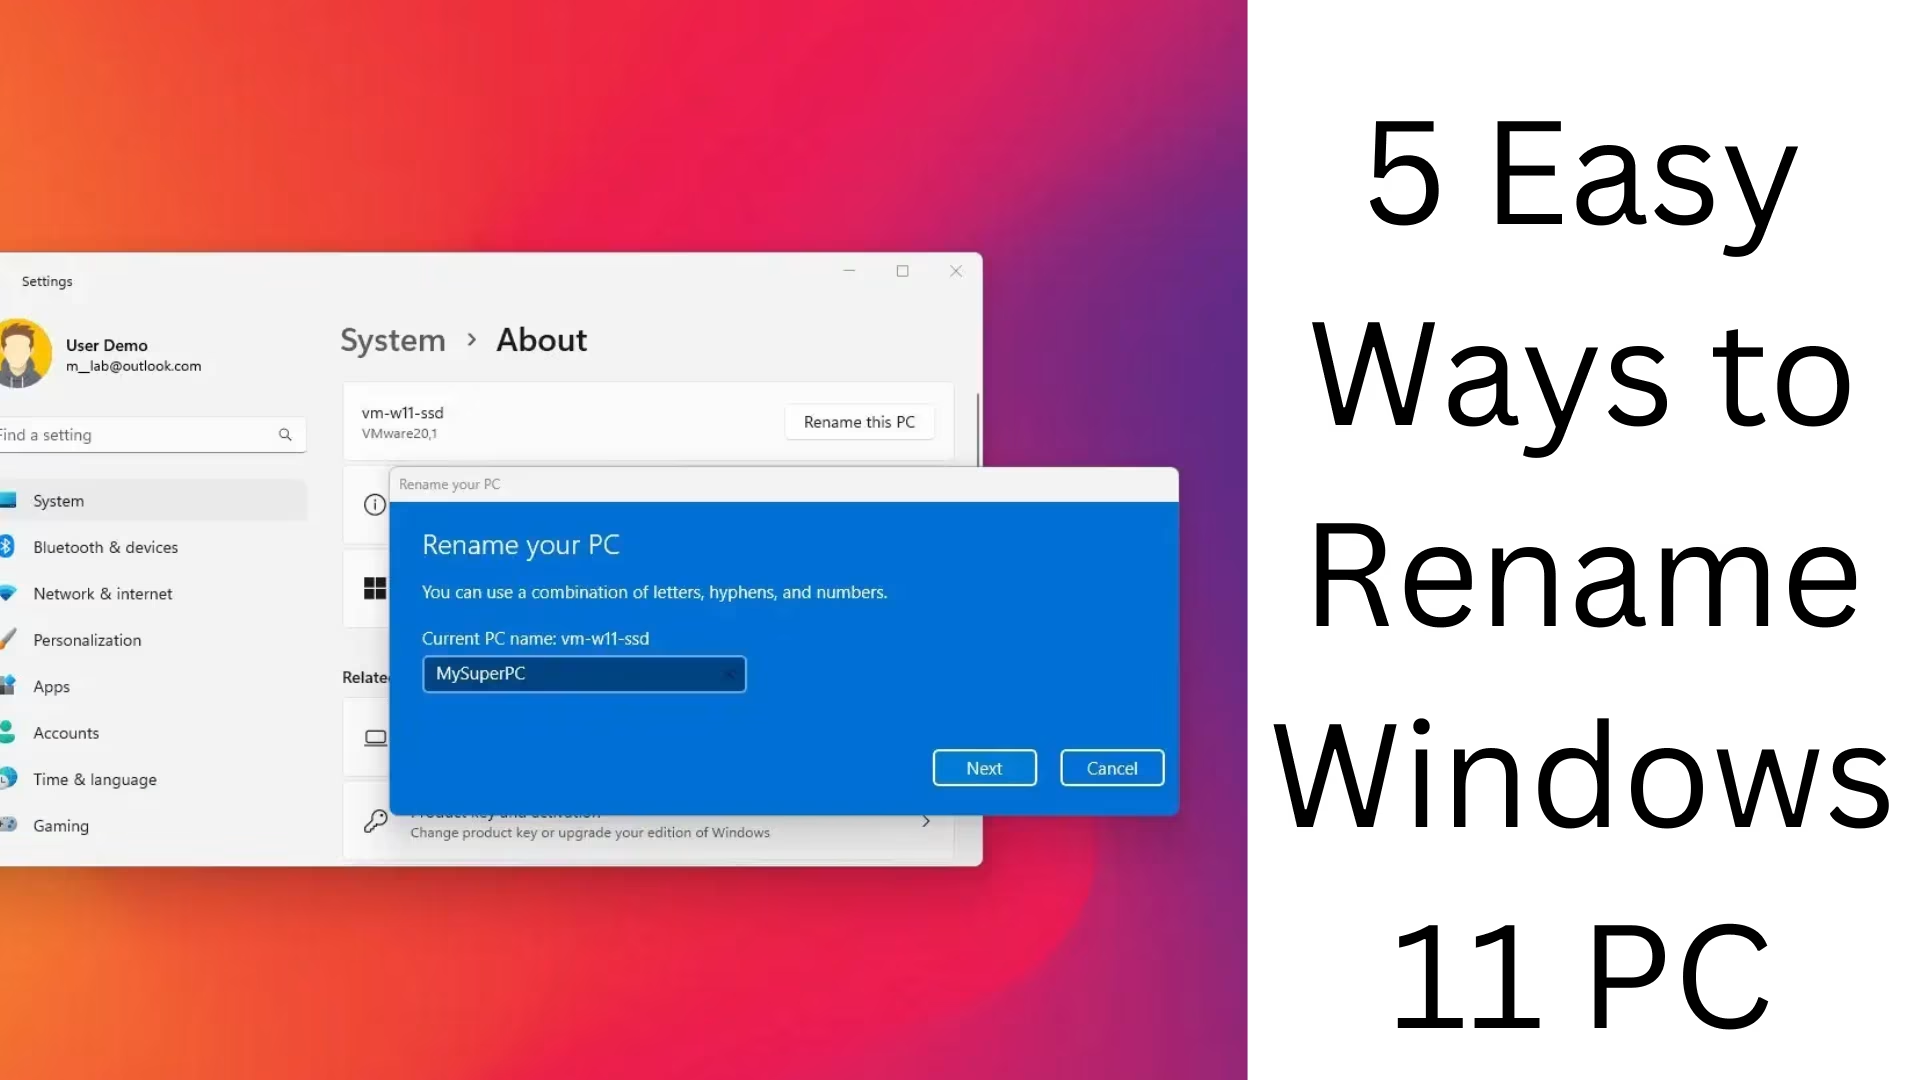
3. Rename the device:
Click on the Rename this PC button in front of “Device name“.
A pop-up window will open. Enter your new name here.
4. Confirm and restart:
Click on “Next” and restart the computer to save the change.
2. Rename via Control Panel
PC name can also be changed using the Control Panel in Windows 11. This method is suitable for older Windows users.
1. Open Control Panel:
Search for “Control Panel” in the Start menu and open it.
2. Select System and Security:
Click on the “System and Security” option.
Then go to “System”.
3. Choose the name change option:
Click on the “Change settings” link on the right side of the screen.
A new window will open. Go to the “Computer Name” tab here.
4. Enter the new name:
Click on the “Change” button.
Enter the new name and press “OK“.
5. Restart:
Restart your system to apply the changes.
3. Use Command Prompt
Command Prompt is a powerful tool for advanced users. Here’s how to use it:
1. Open Command Prompt:
Search for “Command Prompt” in the Start menu.
Select “Run as administrator” to run it in administrator mode.
2. Enter the rename command:
Type:
“`cmd
wmic computersystem where name=”%computername%” call rename name=”new_name”
“`
Enter the new name of your system in place of “new_name”.
3. Complete the process:
Press Enter. You will get a confirmation if the process is successful.
4. Restart:
Renaming requires a system restart.
4. Rename using PowerShell
Windows PowerShell is another advanced tool that allows you to rename a computer.
1. Open PowerShell:
Search for “PowerShell” in the Start menu.
Run it in Administrator mode.
2. Run commands:
Use the following command:
“`powershell
Rename-Computer -NewName “new_name”
“`
Enter the new name of your device in place of “new_name”.
3. Verification:
Restart the system to change the name.
5. Rename via Registry Editor
This method is more advanced and should be used with caution.
1. Open the Registry Editor:
Press `Windows + R` and type “regedit”.
Open the Registry Editor by pressing Enter.
2. Find the correct registry:
Go to the following path:
“`
HKEY_LOCAL_MACHINE\SYSTEM\CurrentControlSet\Control\ComputerName\ActiveComputerName
“`
3. Change the name:
Double-click on the entry of “ComputerName”.
Enter the new name and press “OK”.
4. Restart:
Restart the system to make the change effective.
Additional Tips
Take care while selecting the name:
Keep the name short and clear.
Avoid special characters.
Restart is required:
System restart is required after using any method.
Frequently Asked Questions (FAQ)
1. Why should you change your computer name in Windows 11?
Changing your computer name in Windows 11 helps you easily identify and organize your devices on the network. This is especially useful when you have multiple devices on the same network.
2. Will changing your computer name affect your data or settings?
No, changing your computer name does not affect your data, files, or system settings. It only changes the name of your device, thereby changing its network identity.
3. Is it necessary to restart after changing your computer name?
Yes, after changing the system name, you must restart your computer to make it effective.
4. What is the simplest way to change your computer name?
The simplest and fastest way is to use the Settings app in Windows 11. This process is user-friendly and can be done easily by anyone.
5. Can I use any name?
Yes, you can use any name, but it is suggested that the name should be short and clear. Avoid using special characters and spaces.
6. If I am unfamiliar with Command Prompt or PowerShell, can I use other methods?
Yes, you can change your computer name even without any technical knowledge by using simple methods like the Settings app and Control Panel.
7. Is it safe to use Registry Editor?
One should be careful while using Registry Editor, as making wrong changes in it can cause problems in the system. It should only be used by users who know about it.
8. Does renaming a device affect your Internet connection?
No, renaming a device does not have any negative impact on your Internet connection or network setup.
9. Can I rename as often as I want?
Yes, you can rename your computer as many times as you want.
10. What is the difference between PowerShell and Command Prompt?
PowerShell and Command Prompt are both command-line tools, but PowerShell is more advanced and better for scripting. Command Prompt is suitable for simple tasks.
11. Does renaming have any impact on system performance?
No, renaming has no impact on system performance.