There are many ways available to do screen recording in Windows 11, but recording screens using the Snipping Tool is an easy and useful process. Snipping Tool is already present in Windows 11, making screen recording simple and effective. Let’s learn in this article how to record screens using the Snipping Tool.
What is a Snipping Tool?
Snipping Tool is a pre-installed tool available in the Windows operating system. Earlier it was mainly used to take screenshots, but it has been upgraded in Windows 11, so that now it also provides the option of screen recording.
Why use the Snipping Tool in Windows 11?
1. Easy to use: The interface of Snipping Tool is extremely simple and user-friendly.
2. Pre-installed tool: You do not need to download any separate software.
3. High-quality recording: This tool records the screen in high quality.
4. Fast and safe: The Snipping Tool is developed by Microsoft, so it is completely safe.
Steps to record screen using Snipping Tool
Step 1: Open the Snipping Tool
1. Click on Start Menu.
2. Type “Snipping Tool” in the Search Bar.
3. Select Snipping Tool in the results that appear and open it.
Step 2: Choose Recording Options
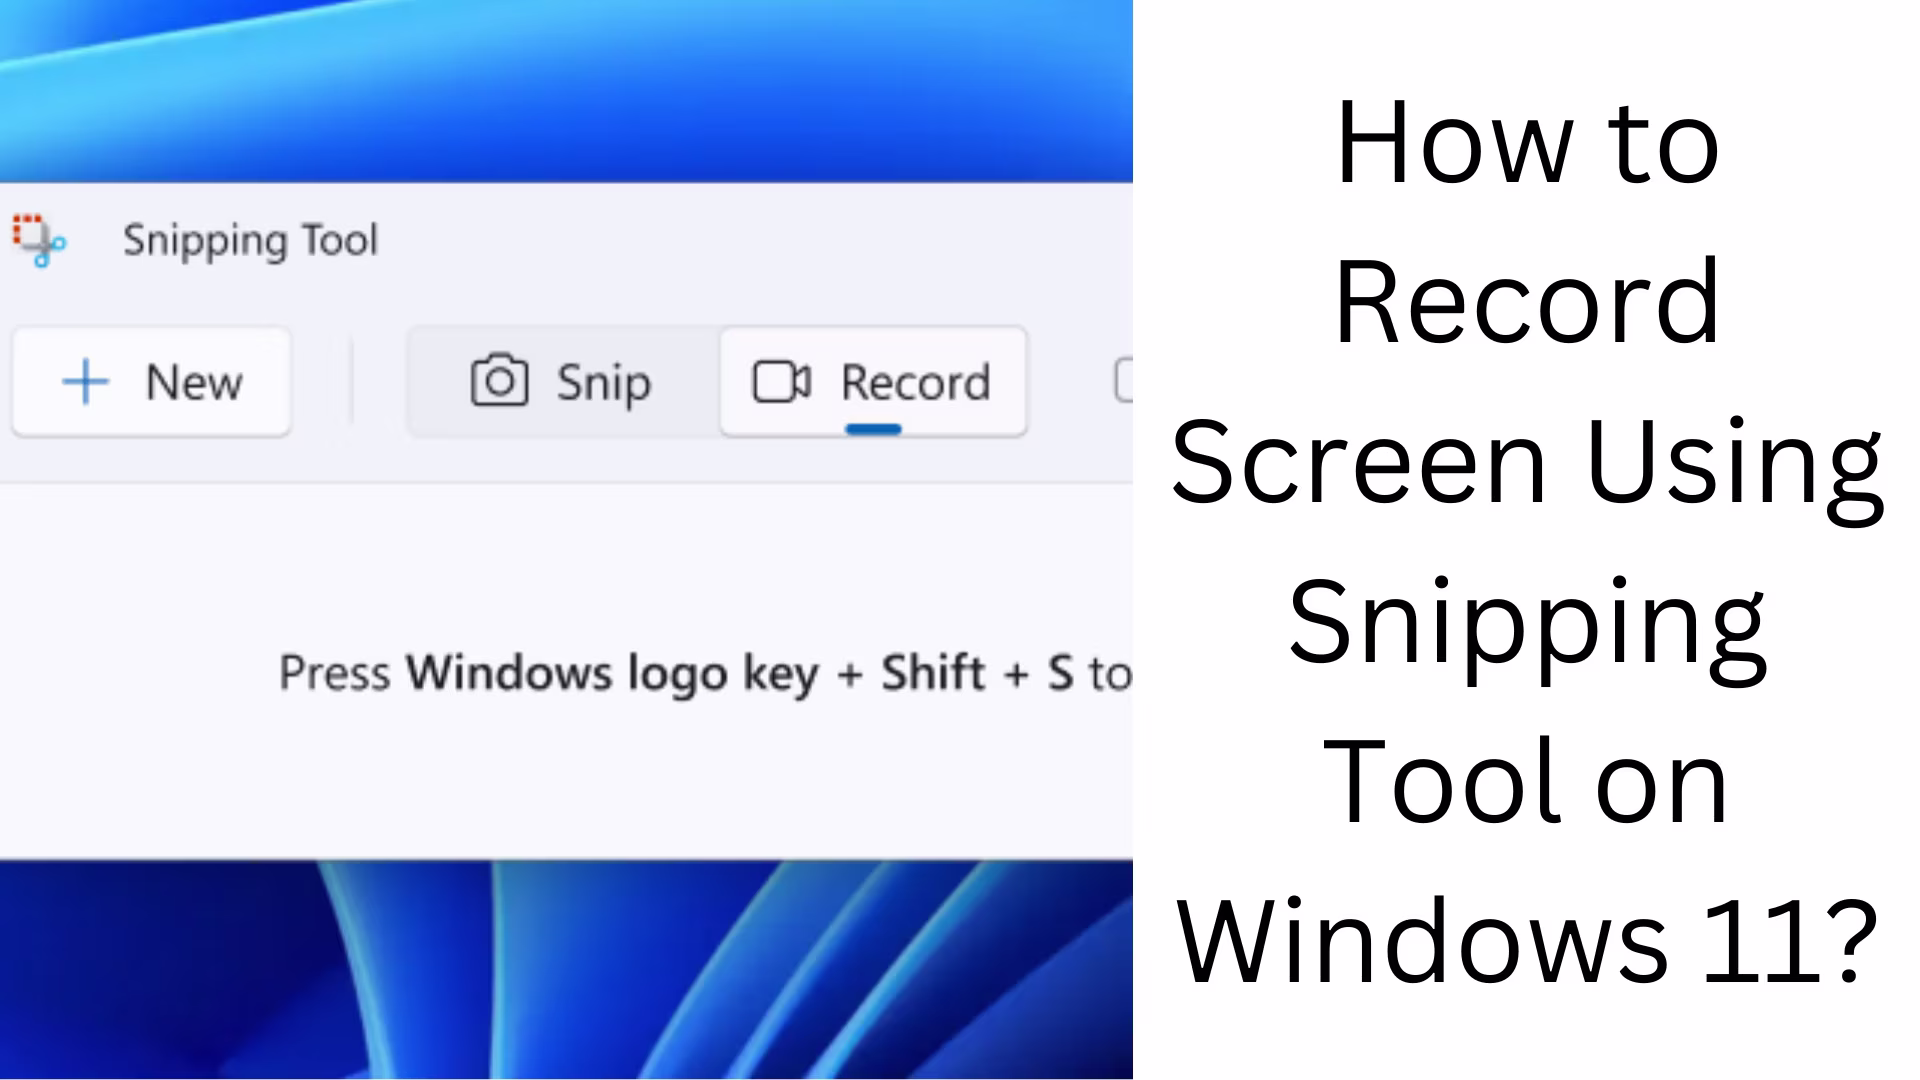
1. After opening the Snipping Tool, you will see “New” and other options.
2. Click on the “Record” button.
3. A new popup window will open in which you can select the area of the screen.
Step 3: Select Recording Area
1. Select the Custom Area that you want to record.
2. If you want to record the whole screen, select the entire screen area.
3. After selecting the area, click on the “Start” button.
Step 4: Start Screen Recording
1. After clicking on Start Recording, the recording will start.
2. Perform whatever activity you want to do on the screen.
Step 5: Stop and Save Recording
1. Click on the “Stop” button to finish the recording.
2. Use the Save As option to save the recording file.
3. You can save the file to your preferred location.
Additional options available in the Snipping Tool
1. Edit and Annotate: You can add notes or markups to screenshots or videos after recording.
2. Customization: In the Snipping Tool, you can change the recording quality, format, and other settings.
3. Shortcuts: You can quickly open the Snipping Tool using Windows + Shift + S.
Things to note while using the Snipping Tool
1. Make sure you have selected the required area correctly before starting the recording.
2. Choose a suitable file name and location to save the recording.
3. Turn off any unnecessary notifications during recording.
Advantages of Snipping Tool
1. Free and User-Friendly: It is completely free and simple to use compared to other software.
2. Fast Performance: It works without affecting the speed of your system.
3. Saving in Various Formats: You can save the recording in MP4 or other formats.
FAQs related to the Snipping Tool
Does Snipping Tool have an audio recording option?
Yes, the system audio recording option is available in the Snipping Tool, but you may have to change the settings to record audio from the microphone.
Can live stream be recorded using the Snipping Tool?
Yes, it is possible to record live streams using the Snipping Tool. You only need to select the right area of the screen.
Where is the Snipping Tool’s recording file saved?
By default, the recording file is saved in your “Videos” folder.
Conclusion
Using the Snipping Tool in Windows 11 is a great option if you want to record a screen without any external software.
Frequently Asked Questions (FAQ) related to Snipping Tool
1. Can the Snipping Tool be used in all Windows 11 versions?
Yes, the Snipping Tool is available in all Windows 11 versions and can be used for taking screenshots and screen recording.
2. Does audio also get recorded while recording the screen with the Snipping Tool?
Yes, system audio can be recorded with the Snipping Tool. If you want to record audio from the microphone, it has to be enabled in the settings.
3. In which format can the recordings be saved with the Snipping Tool?
Recordings with Snipping Tool are usually saved in MP4 format.
4. Can live stream be recorded using the Snipping Tool?
Yes, the Snipping Tool can be used for live-stream recording. You just need to select the area of the screen that you want to record.
5. What is the maximum recording time in Snipping Tool?
There is no limit on the recording time with Snipping Tool, but it depends on the storage capacity of your system.
6. What to do if the Snipping Tool is not working properly?
If the Snipping Tool is not working, you can try the following steps:
Update Windows.
Restart the Snipping Tool.
Reset Snipping Tool settings.
Contact Windows Support.
7. How to improve screen recording quality with the Snipping Tool?
You can choose the High-Quality option by going to Snipping Tool settings.
8. Can Snip Tool record background apps during recording?
No, the Snipping Tool only records the screen area you select.
9. Where is the recording file of the Snipping Tool saved by default?
The recording file is saved in the “Videos” folder by default.
10. Is the Snipping Tool free to use?
Yes, Snipping Tool is pre-installed in Windows 11 and is completely free.
11. Are there editing options in the Snipping Tool?
Yes, the Snipping Tool has options to edit and annotate screenshots and videos.
12. What is the shortcut to quickly open the Snipping Tool?
You can quickly open the Snipping Tool by using the Windows + Shift + S shortcut.
13. Does Snipping Tool offer a screen recording option in Windows 10?
No, the screen recording option of the Snipping Tool is only available in Windows 11.